

Understanding Dark Mode
Dark mode is a popular feature that allows users to change the color scheme of their devices, reducing eye strain, especially in low-light environments. Many users appreciate the aesthetic appeal of dark mode as well as its potential to save battery life on OLED screens. This guide will walk you through how to make Mac dark mode automatically and provide a workaround for Windows users.
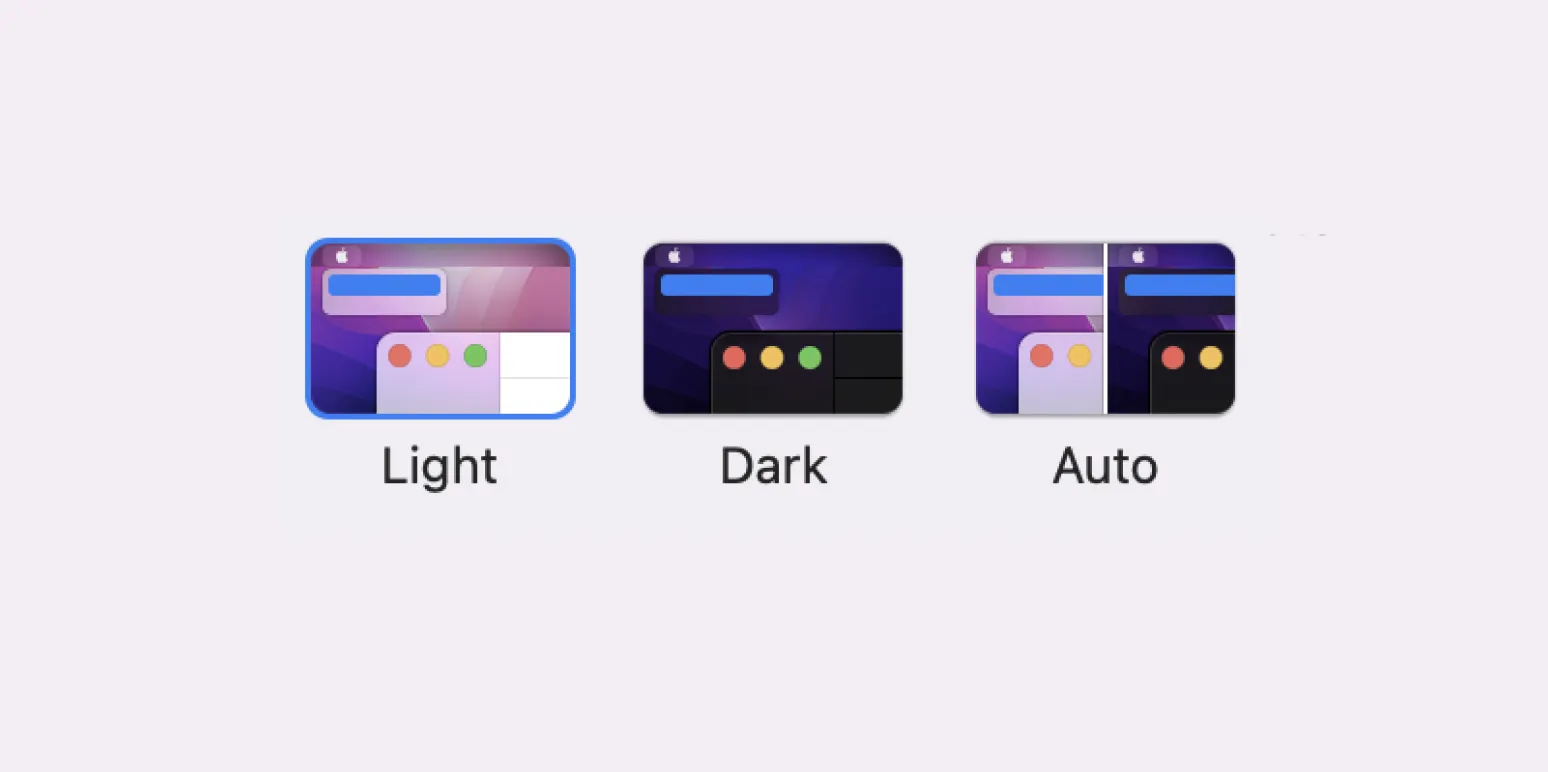
How to Enable Dark Mode on Mac
Enabling dark mode on your Mac is a straightforward process. Follow these steps:
- Click on the Apple menu in the top-left corner of your screen.
- Select System Preferences.
- Click on General.
- In the Appearance section, choose Dark.
- To make it automatic, you can schedule it based on your preferences.
Scheduling Dark Mode Automatically on Mac
You can set your Mac to switch between light and dark mode automatically based on the time of day. Here’s how:
- In the System Preferences, go to Displays.
- Select the Night Shift tab.
- Check the box for Turn On Until Tomorrow or schedule it based on your desired times.
Using Automator for Advanced Scheduling
If you want more control over your scheduling, you can use Automator to create a custom workflow:
- Open Automator from your Applications folder.
- Select New Document and choose Calendar Alarm.
- In the Automator window, search for Run Shell Script and drag it to the right pane.
- Input the following command to switch to dark mode:
defaults write NSGlobalDomain AppleInterfaceStyle -string "Dark"
To switch back to light mode, use:
defaults write NSGlobalDomain AppleInterfaceStyle -string "Light"
Save your workflow, and it will appear in your Calendar app, allowing you to set specific times for switching modes.
Workaround for Windows Users
For Windows users who want a similar experience, here’s how to enable dark mode in Windows 10 and 11:
- Open Settings by pressing Windows + I.
- Click on Personalization.
- Choose Colors.
- Scroll down to the Choose your default app mode section.
- Select Dark to enable dark mode.
Auto-Switching Dark Mode on Windows
Unlike macOS, Windows does not offer built-in scheduling for dark mode. However, third-party applications can help achieve this:
Third-Party Applications
Consider using applications like Auto Dark Mode or Task Scheduler for scheduling dark mode on Windows:
| Application | Features |
|---|---|
| Auto Dark Mode | Automatically switches between light and dark mode based on sunrise and sunset times. |
| Task Scheduler | Allows users to create scheduled tasks for switching themes, providing full control over timing. |
Benefits of Dark Mode
Switching to dark mode has several benefits:
- Reduced Eye Strain: Dark backgrounds can be easier on the eyes during extended use, especially at night.
- Improved Battery Life: On OLED screens, dark mode can save battery life by using less power to display darker colors.
- Enhanced Focus: Many users find that dark mode helps them concentrate better by reducing distractions.
Conclusion
Dark mode is a great feature for both Mac and Windows users, providing aesthetic and practical benefits. By following the steps outlined above, you can easily enable dark mode on your Mac and set it to switch automatically based on your schedule. For Windows users, while the native options may be limited, third-party applications offer effective solutions for achieving the same outcome.
Embrace the dark side and enjoy a more comfortable computing experience!


