Locking cells in Google Sheets is an essential skill for anyone who collaborates on spreadsheets. By securing certain cells, you can prevent unwanted changes and maintain the integrity of your data. This guide will walk you through the process of locking cells, ensuring that your important information remains safe while allowing others to input data where necessary.
Understanding Cell Locking in Google Sheets
Before diving into the steps, it's crucial to understand what it means to lock cells. In Google Sheets, locking cells prevents users with editing access from modifying specific parts of the spreadsheet. This feature is particularly useful in scenarios where you want to restrict edits to critical data, such as formulas, headers, or reference information.
Steps to Lock Cells in Google Sheets
Follow these steps to lock cells in Google Sheets:
- Select the Cells You Want to Lock: Click and drag to highlight the cells you wish to lock. You can select multiple cells, rows, or columns based on your requirements.
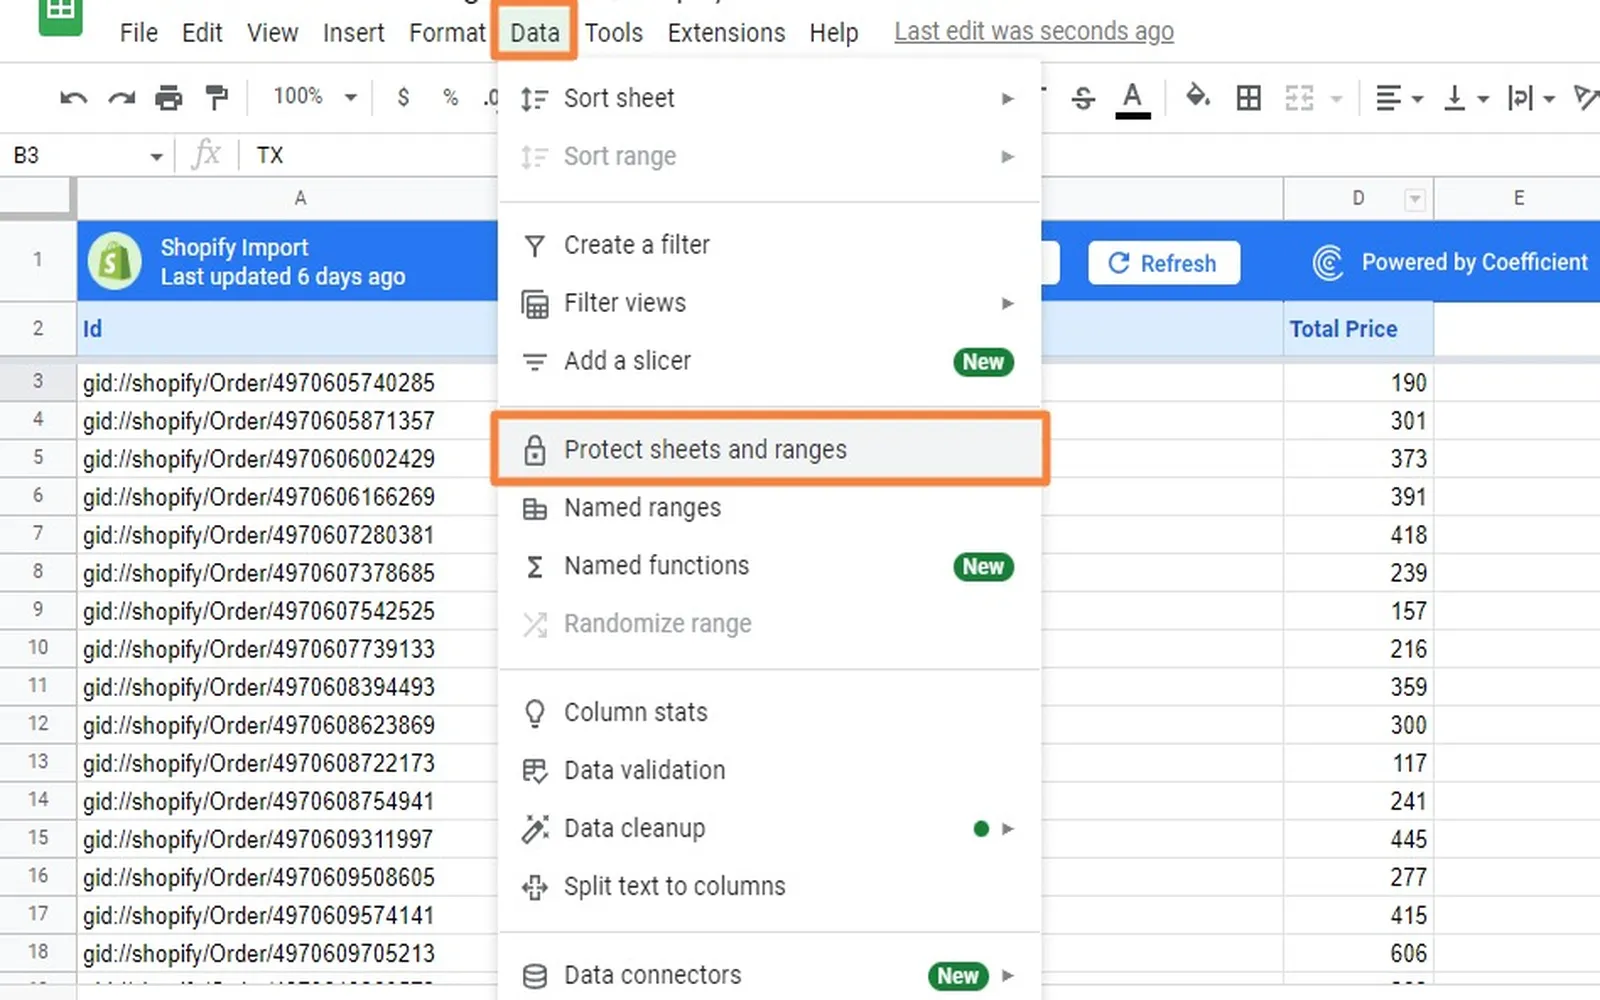
- Open the Protect Range Option: Right-click on the selected cells and choose "Protect range" from the context menu. Alternatively, you can navigate to the "Data" menu at the top and select "Protected sheets and ranges."
- Add a Description (Optional): In the sidebar that appears, you can provide a description for the range you are protecting. This step is optional, but it can help you remember why you locked these cells.
- Set Permissions: Click on "Set permissions" to define who can edit the selected cells. You have the option to restrict editing to only yourself or allow specific people to have editing rights. To lock the cells completely, select "Only me."
- Save Your Settings: After setting your permissions, click "Done" to lock the cells. Your chosen cells are now protected!
Utilizing the Protected Range Feature
Using the protected range feature is an effective way to manage collaboration in Google Sheets. When you lock cells, consider using the following tips:
- Highlight Important Data: Use cell colors or borders to highlight locked cells. This visual cue helps collaborators understand which cells are off-limits.
- Communicate Changes: If you update the permissions or unlock certain cells, inform your team. Clear communication ensures everyone knows which areas they can edit.
- Regularly Review Permissions: If your team changes or project requirements evolve, regularly review and adjust your cell locking settings as necessary.
Common Scenarios for Locking Cells
Locking cells can be beneficial in various scenarios:
- Budget Tracking: When managing a budget in Google Sheets, lock the total and formula cells to prevent accidental edits while allowing team members to input their expenses.
- Project Planning: In project management sheets, lock key milestones or deadlines to keep them intact while enabling team members to update their tasks.
- Data Analysis: When creating dashboards, lock the reference data or calculations to ensure the analysis remains accurate while allowing updates to raw data.
Using Comments and Notes in Locked Cells
Even with locked cells, it's vital to provide context. You can add comments or notes to locked cells to give collaborators guidance on the data. To add a comment:
- Select the Locked Cell: Click on the cell you want to comment on.
- Insert Comment: Right-click and select "Comment" or click on the comment icon in the toolbar.
- Type Your Comment: Provide any necessary information or instructions regarding the locked cell.
- Save the Comment: Click "Comment" to save your note.
Comments can help prevent confusion and clarify why certain cells are protected.
Best Practices for Locking Cells in Google Sheets
To maximize the effectiveness of locked cells, consider these best practices:
- Limit Locked Cells: Only lock cells that are critical to your project. Overprotecting can frustrate collaborators.
- Use Version History: Regularly check the version history to monitor changes made to your sheet. This feature allows you to revert to previous versions if needed.
- Educate Your Team: Ensure your team understands how to work within the constraints of locked cells. Provide training or resources if necessary.
Conclusion
Locking cells in Google Sheets is a straightforward yet powerful way to maintain data integrity while collaborating with others. By following the steps outlined in this guide and utilizing best practices, you can effectively manage your spreadsheets and ensure that critical information remains secure. Embrace the power of cell locking to enhance your productivity and streamline your collaborative efforts.


